
Today is day three. We've already talked about the project and the prizes but here are the links if you need to catch up. It's not too late to join.
Tuesday, June 19 - the giveaway prizes
A few tips before we put the pattern together
1. It is important that pay attention to Jen’s directions in the pattern if this is your first time making these patterns. She writes the best directions in the pdf pattern world. You can trust her and follow them to the letter. If, however, you have made a pattern before and have a more comfortable way of sewing, by all means do it your way.
2. How to choose a size. This is probably the most commonly asked question in sewing. Trust the Tie Dye Diva size chart. My mode's mother measured her chest at 20" and she is 35" tall. Since I want her to be able to wear this for a while, I am going to make her a 2T/3T in the girl's peasant dress pattern. Remember that the chart is for body measurements, not age or finished garment measurements.
3. On to style! I have decided to sew the short sleeves style for my first example but I will also cut out and start a flutter sleeve example in case you have questions about that style. I am also doing the ruffled hem. There are so many options with this peasant, so choose the one that suits your style.
4. Fabric choices. You can use any mid or light weight quilting cotton or anything that is about the same weight. Voile would be pretty and a tad more dressy. Batiste or swiss dot would also be pretty. Eyelet, gingham, light-weight linen, poplin, or seersucker would all also be darling.

Tip! I recommend choosing two fabrics at most for the dress and two at most for the pinafore but watch for busyness. I initially had too many prints in my pinafore and it was way too busy. I took it apart and recreated it with just one, except pockets. It looks much nicer!
Time to print out the pattern and start putting it together!
1. Print out your pattern and make sure your 1" square measures 1." I like to lay out the pattern, as you see below, before I cut it out. That way, I make sure I have all the pieces and I know where they are going to go. I don't have a large cutting area, so I then stack them up in rows and cut and paste one row at a time. Make sure the marks all line up correctly and the numbers are in order before you start cutting.

2. I like to cut off one side and then tape it to the other. This is just my preferred way. You might have your own.

3. After I put together the rows, I start attaching them to each other to make the whole pattern. Here is where mistakes might happen, in my experience, so use your scissors and recut and retape if need be. Get those marks all lined up nicely!!

4. My secret weapon is my old school tape dispenser! It makes a great pattern weight.

Tip: If you are going to this pattern over and over, consider keeping it all in one piece and using Swedish Tracing Paper to trace out just the size you need. Swedish Tracing Paper can be bought at Amazon (affiliate link in side bar). I love the stuff!!
Time to cut out the pattern pieces!
I didn't take pictures of this part because my sewing area is so small but I want to remind you to make sure to note the notches for the front and back dress and sleeves. This is very important! The back of the dress is higher than the front, so you need these notches to line everything up correctly. Here are my pieces all lined up.

Time to sew!
The directions are awesome, so I will just mention a few tips and then you can ask me any questions YOU have about sewing this pattern together.
When you sew the hem of the sleeves, do you want to add trim? Be aware of the shape of the sides. There is an indentation for ironing the hem properly. Do some fussy cutting on the sleeves, like I did, so your print is featured!

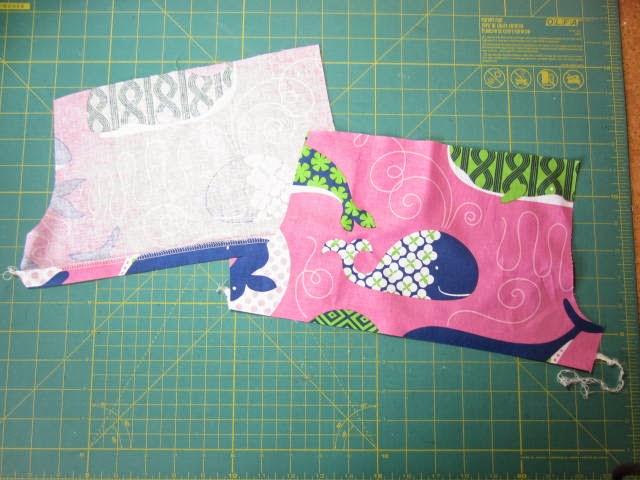
I used white tailor's chalk, so it is hard to see, but my front sleeve notches line up with the front dress notch. Yay! Now my dress' sleeves will match the body of the dress. Pay attention to this!

I have two specialty feet for my sewing machine, one gathers and one ruffles. I use one of them to gather my ruffle hem. But Jen's directions for gathering are also great! Before I got the specialty feet, I used fishing line and zig zag to gather.

A tip for the elastic - Safety pin the end to the opening so you don't lose it.
Iron and admire your dress!

Tomorrow, we will learn more about the sponsors and continue to sew the peasant. I will talk more about the flutter sleeves tomorrow. Friday will be for finishing up the peasant.
Thanks for joining!

A few tips before we put the pattern together
1. It is important that pay attention to Jen’s directions in the pattern if this is your first time making these patterns. She writes the best directions in the pdf pattern world. You can trust her and follow them to the letter. If, however, you have made a pattern before and have a more comfortable way of sewing, by all means do it your way.
2. How to choose a size. This is probably the most commonly asked question in sewing. Trust the Tie Dye Diva size chart. My mode's mother measured her chest at 20" and she is 35" tall. Since I want her to be able to wear this for a while, I am going to make her a 2T/3T in the girl's peasant dress pattern. Remember that the chart is for body measurements, not age or finished garment measurements.
3. On to style! I have decided to sew the short sleeves style for my first example but I will also cut out and start a flutter sleeve example in case you have questions about that style. I am also doing the ruffled hem. There are so many options with this peasant, so choose the one that suits your style.
4. Fabric choices. You can use any mid or light weight quilting cotton or anything that is about the same weight. Voile would be pretty and a tad more dressy. Batiste or swiss dot would also be pretty. Eyelet, gingham, light-weight linen, poplin, or seersucker would all also be darling.
Tip! I recommend choosing two fabrics at most for the dress and two at most for the pinafore but watch for busyness. I initially had too many prints in my pinafore and it was way too busy. I took it apart and recreated it with just one, except pockets. It looks much nicer!
Time to print out the pattern and start putting it together!
1. Print out your pattern and make sure your 1" square measures 1." I like to lay out the pattern, as you see below, before I cut it out. That way, I make sure I have all the pieces and I know where they are going to go. I don't have a large cutting area, so I then stack them up in rows and cut and paste one row at a time. Make sure the marks all line up correctly and the numbers are in order before you start cutting.
2. I like to cut off one side and then tape it to the other. This is just my preferred way. You might have your own.
3. After I put together the rows, I start attaching them to each other to make the whole pattern. Here is where mistakes might happen, in my experience, so use your scissors and recut and retape if need be. Get those marks all lined up nicely!!
4. My secret weapon is my old school tape dispenser! It makes a great pattern weight.
Tip: If you are going to this pattern over and over, consider keeping it all in one piece and using Swedish Tracing Paper to trace out just the size you need. Swedish Tracing Paper can be bought at Amazon (affiliate link in side bar). I love the stuff!!
Time to cut out the pattern pieces!
I didn't take pictures of this part because my sewing area is so small but I want to remind you to make sure to note the notches for the front and back dress and sleeves. This is very important! The back of the dress is higher than the front, so you need these notches to line everything up correctly. Here are my pieces all lined up.
Time to sew!
The directions are awesome, so I will just mention a few tips and then you can ask me any questions YOU have about sewing this pattern together.
When you sew the hem of the sleeves, do you want to add trim? Be aware of the shape of the sides. There is an indentation for ironing the hem properly. Do some fussy cutting on the sleeves, like I did, so your print is featured!
I used white tailor's chalk, so it is hard to see, but my front sleeve notches line up with the front dress notch. Yay! Now my dress' sleeves will match the body of the dress. Pay attention to this!
I have two specialty feet for my sewing machine, one gathers and one ruffles. I use one of them to gather my ruffle hem. But Jen's directions for gathering are also great! Before I got the specialty feet, I used fishing line and zig zag to gather.
A tip for the elastic - Safety pin the end to the opening so you don't lose it.
Iron and admire your dress!
Tomorrow, we will learn more about the sponsors and continue to sew the peasant. I will talk more about the flutter sleeves tomorrow. Friday will be for finishing up the peasant.
Thanks for joining!
No comments:
Post a Comment